# Data Sources
Before inserting your first point cloud into an Autodesk Revit document using the Qbitec for Revit Plugin, you must first configure a data source. A data source is the location where your point cloud data is stored.
A data source can be either a local folder or a network drive / folder or a remote source in the cloud such as NavVis IVION.
### Adding a new Data Source
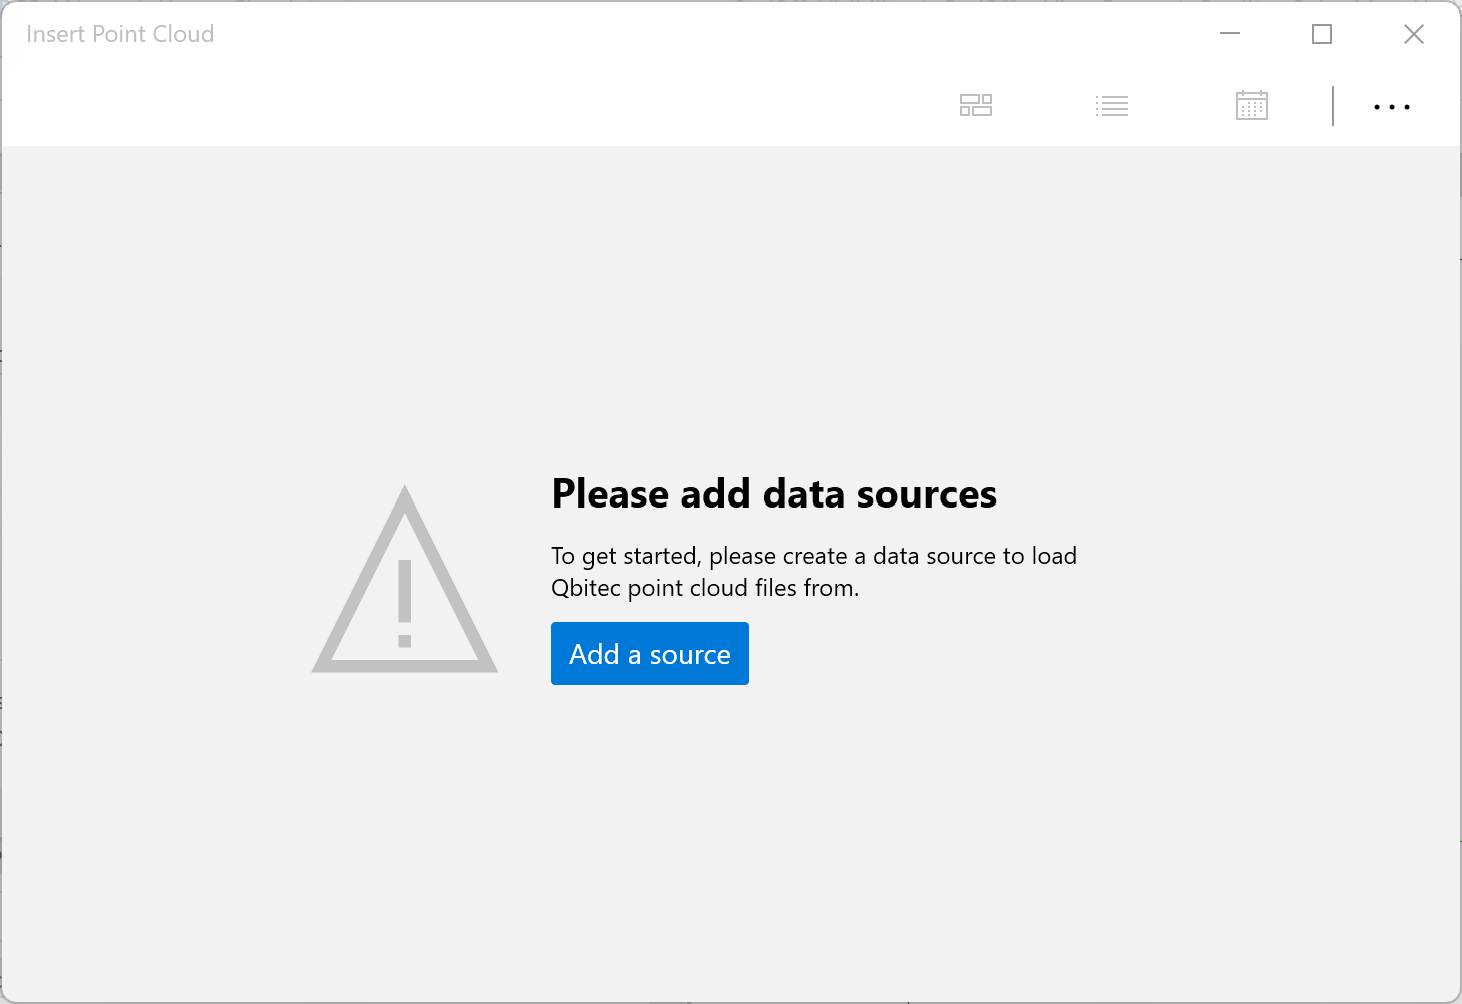
If no data source has been configured yet and you click the **Insert Point Cloud** button in the Qbitec Ribbon, the **Insert Point Cloud** window will notify you that a new source must be created before a point cloud can be inserted.
[](https://qbitec.com/kb/uploads/images/gallery/2026-03/image.png)
Click on the **Add a source** button to configure your first data source.
If data sources already exist and an additional one needs to be added, open the **Qbitec Settings** dialog via the **Config/License** button in the Qbitec Revit Plugin ribbon in Autodesk Revit.
[](https://qbitec.com/kb/uploads/images/gallery/2026-03/75zimage.png)
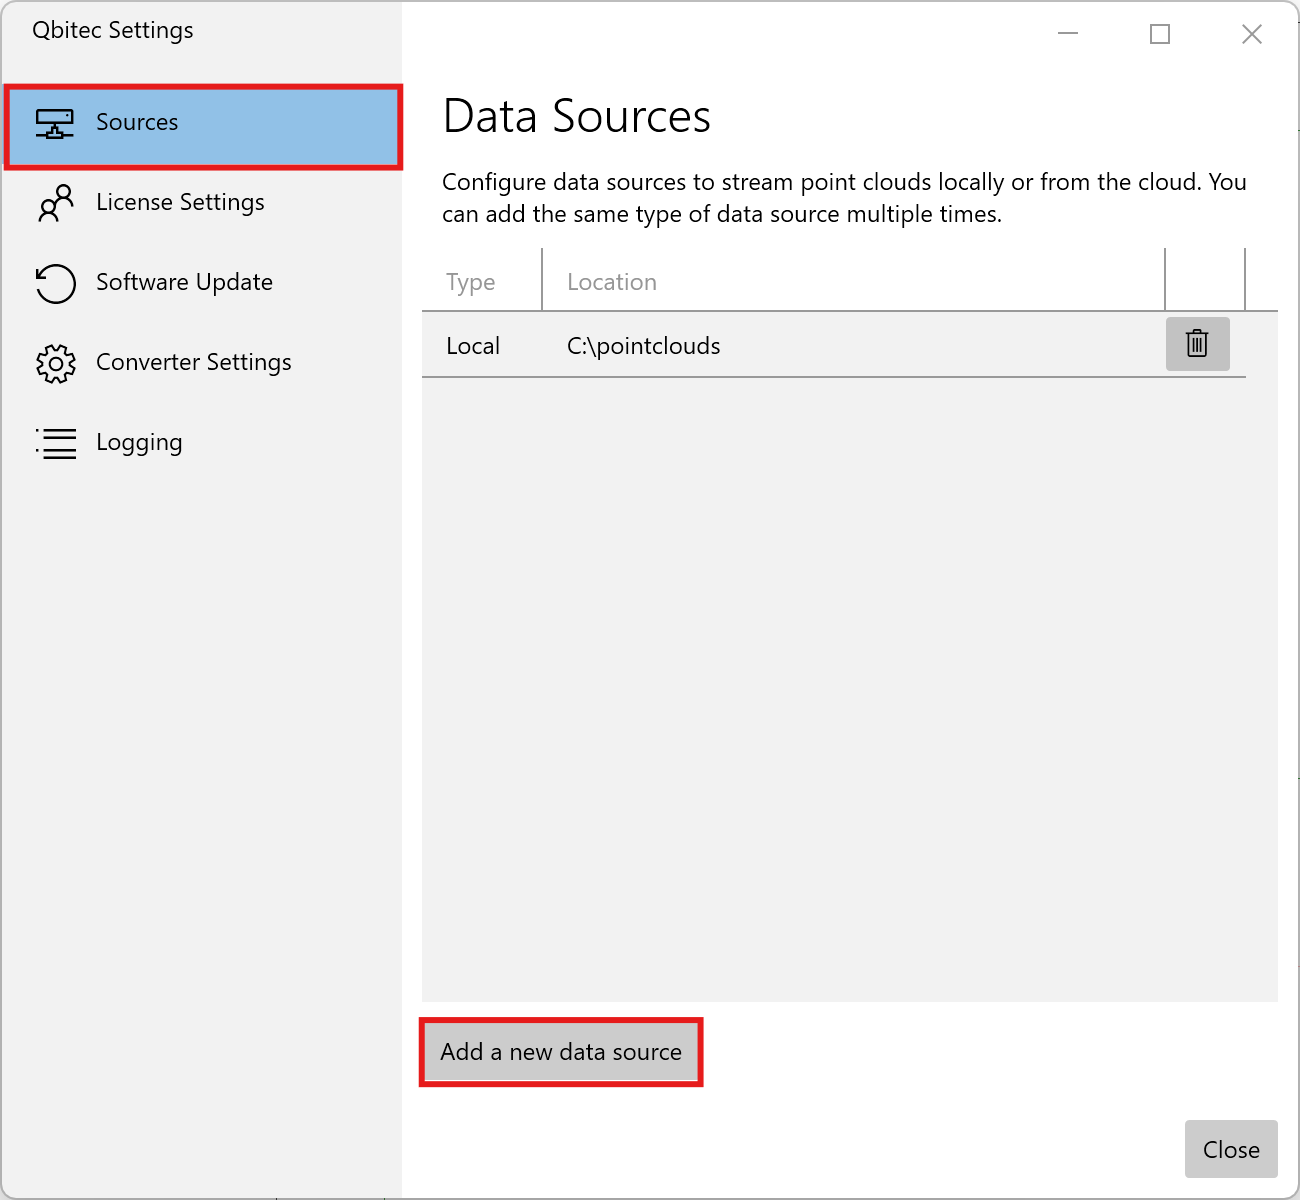
Then select **Sources** on the left side and click **Add a new data source** to start the wizard for creating a new data source.
[](https://qbitec.com/kb/uploads/images/gallery/2026-03/mx3image.png)
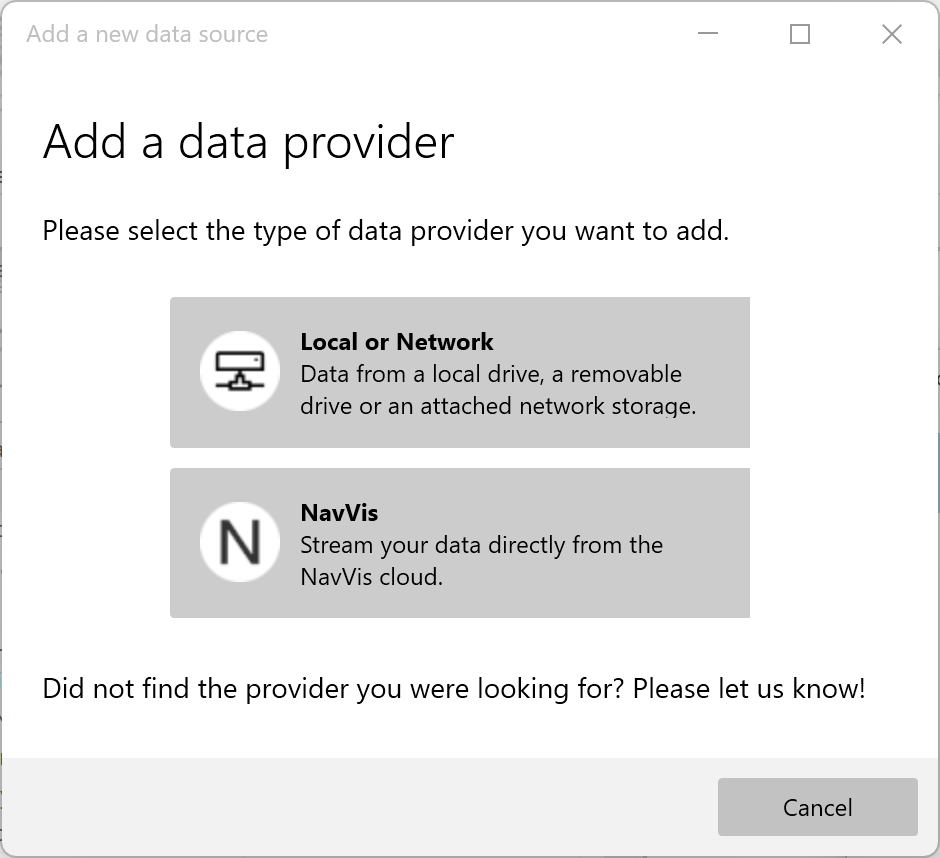
First you need to select the type of data provider which can be either **Local or Network** or a **NavVis** IVION instance.
[](https://qbitec.com/kb/uploads/images/gallery/2026-03/xPHimage.png)
### Local or Network Sources
If you plan to store your point clouds in a folder on a local hard drive, an external USB drive, or a network drive path, you need to configure a **local data source**.
You can either select a folder that already contains Qbitec point clouds, or choose a new folder where Qbitec point clouds will be stored in the future.
[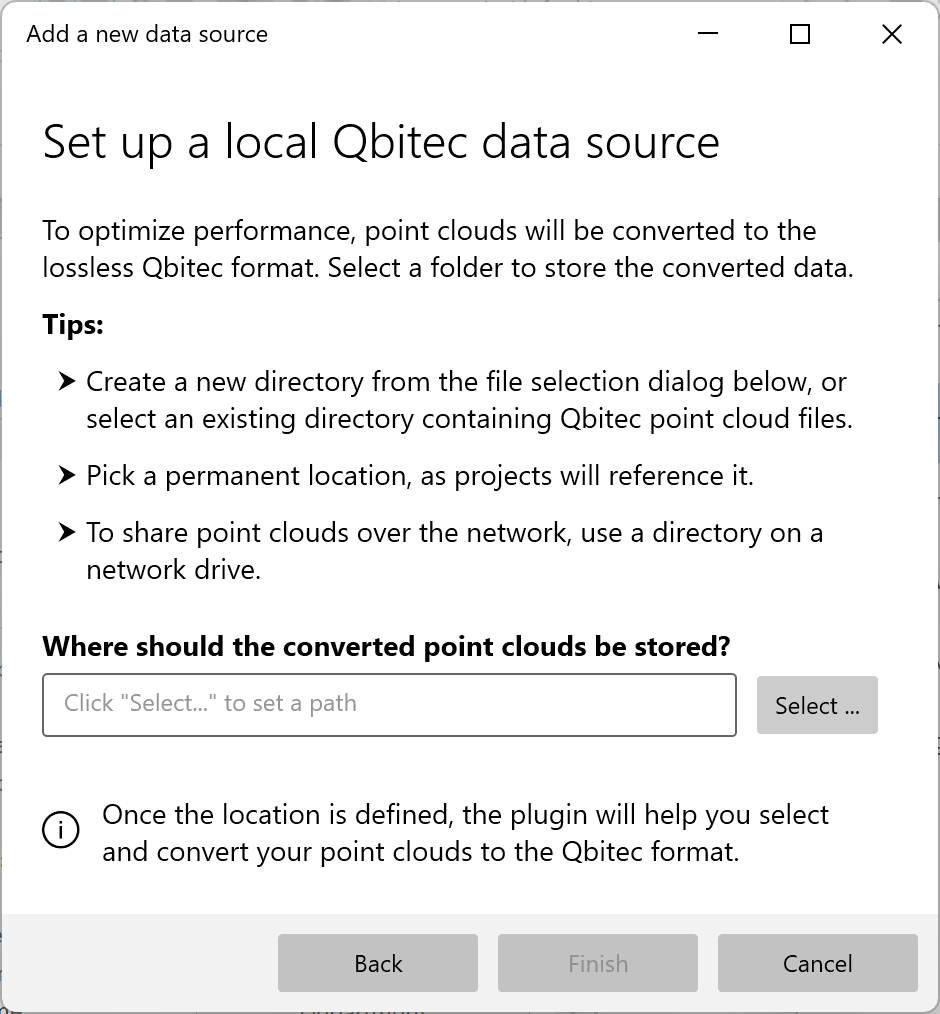](https://qbitec.com/kb/uploads/images/gallery/2026-03/QVSimage.png)
Point clouds that are not available in the Qbitec format—such as files in **E57**, Autodesk ReCap, or **LAS/LAZ** format—must first be converted.
The selected target path refers to the folder where the converted point clouds will be stored, not the location of the original source data.
Once a valid folder is selected click on the **Finish** button to complete the wizard.
To convert your first point cloud see [Point Cloud Conversion section](https://qbitec.com/kb/link/20#bkmrk-page-title "Point Cloud Conversion section") for more details.
### NavVis IVION Sources
If you chose to set up a new NavVis Ivion instance as a data source you first need to provide the URL of the instance.
[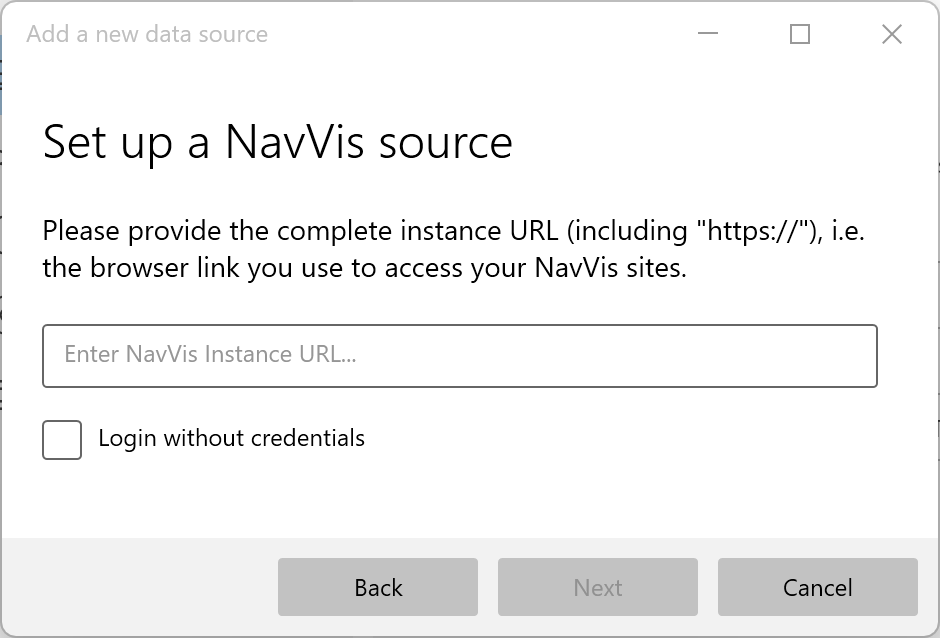](https://qbitec.com/kb/uploads/images/gallery/2026-03/VqEimage.png)
NavVis instances can be configured to allow public access, enabling users to view point clouds and/or panoramic images without requiring a password.
If access to the instance should be possible without credentials, the **Login without credentials** option must be enabled. If access is intended to require a specific login, this option must remain disabled.
Control over which data within the instance is accessible is managed entirely on the server side. Furthermore, the plugin operates in a strictly read-only manner. It does not perform any API calls to the NavVis instance that could modify or delete data.
When clicking **Next**, the connection to the instance is tested. If required, your default web browser will open to handle the login process. Enter your credentials and click **Allow access**.
Since the authentication process is handled entirely through the browser, the Qbitec plugin never has access to the actual password. As a result, the same rules apply as when accessing the NavVis web interface in a browser—for example, regarding password storage via password managers or the use of SSO mechanisms.
Complete the creation of the NavVis source by clicking the **Finish** button.
### Manage Existing Data Sources
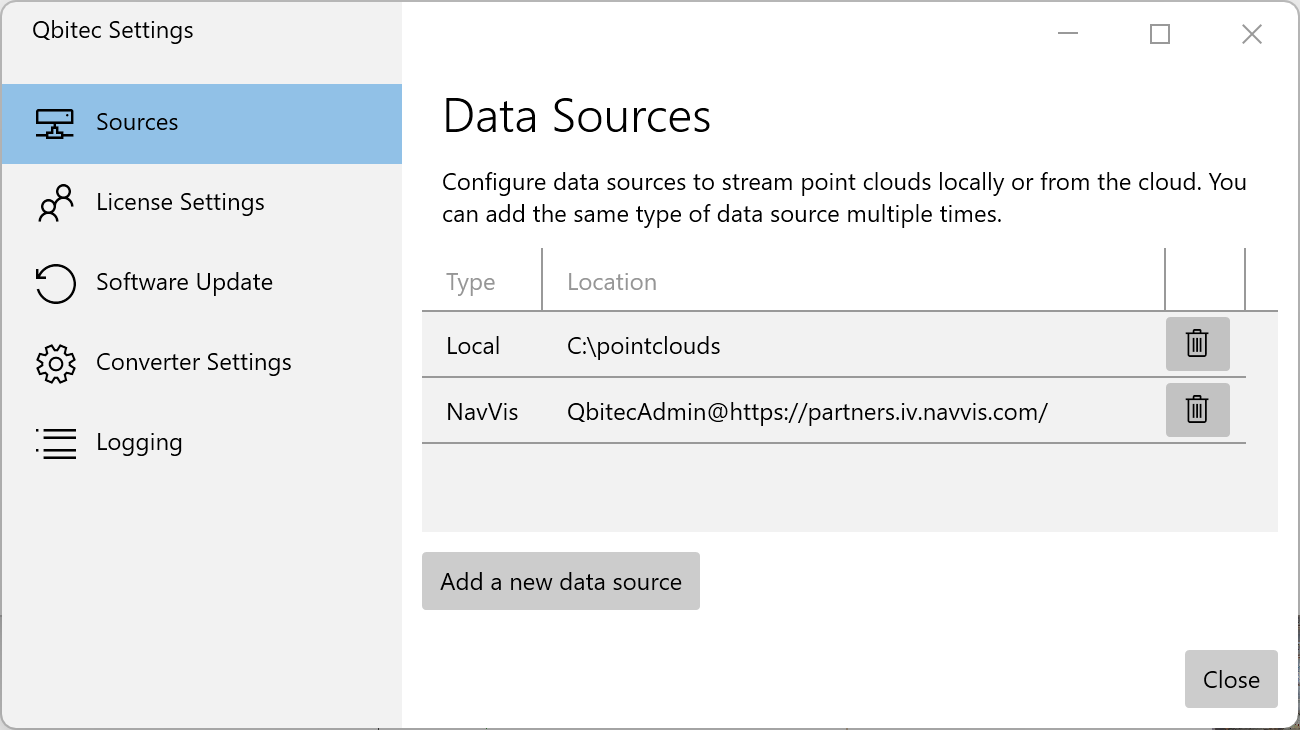
To manage existing data sources open the **Qbitec Settings** dialog and select **Sources** on the left.
[](https://qbitec.com/kb/uploads/images/gallery/2026-03/IrKimage.png)
Under **Data Sources**, a list of all configured data sources is displayed, including their associated type and location.
A data source can be removed using the button with the trash can icon. This action only removes the reference to the respective data source; the underlying data itself is not deleted!