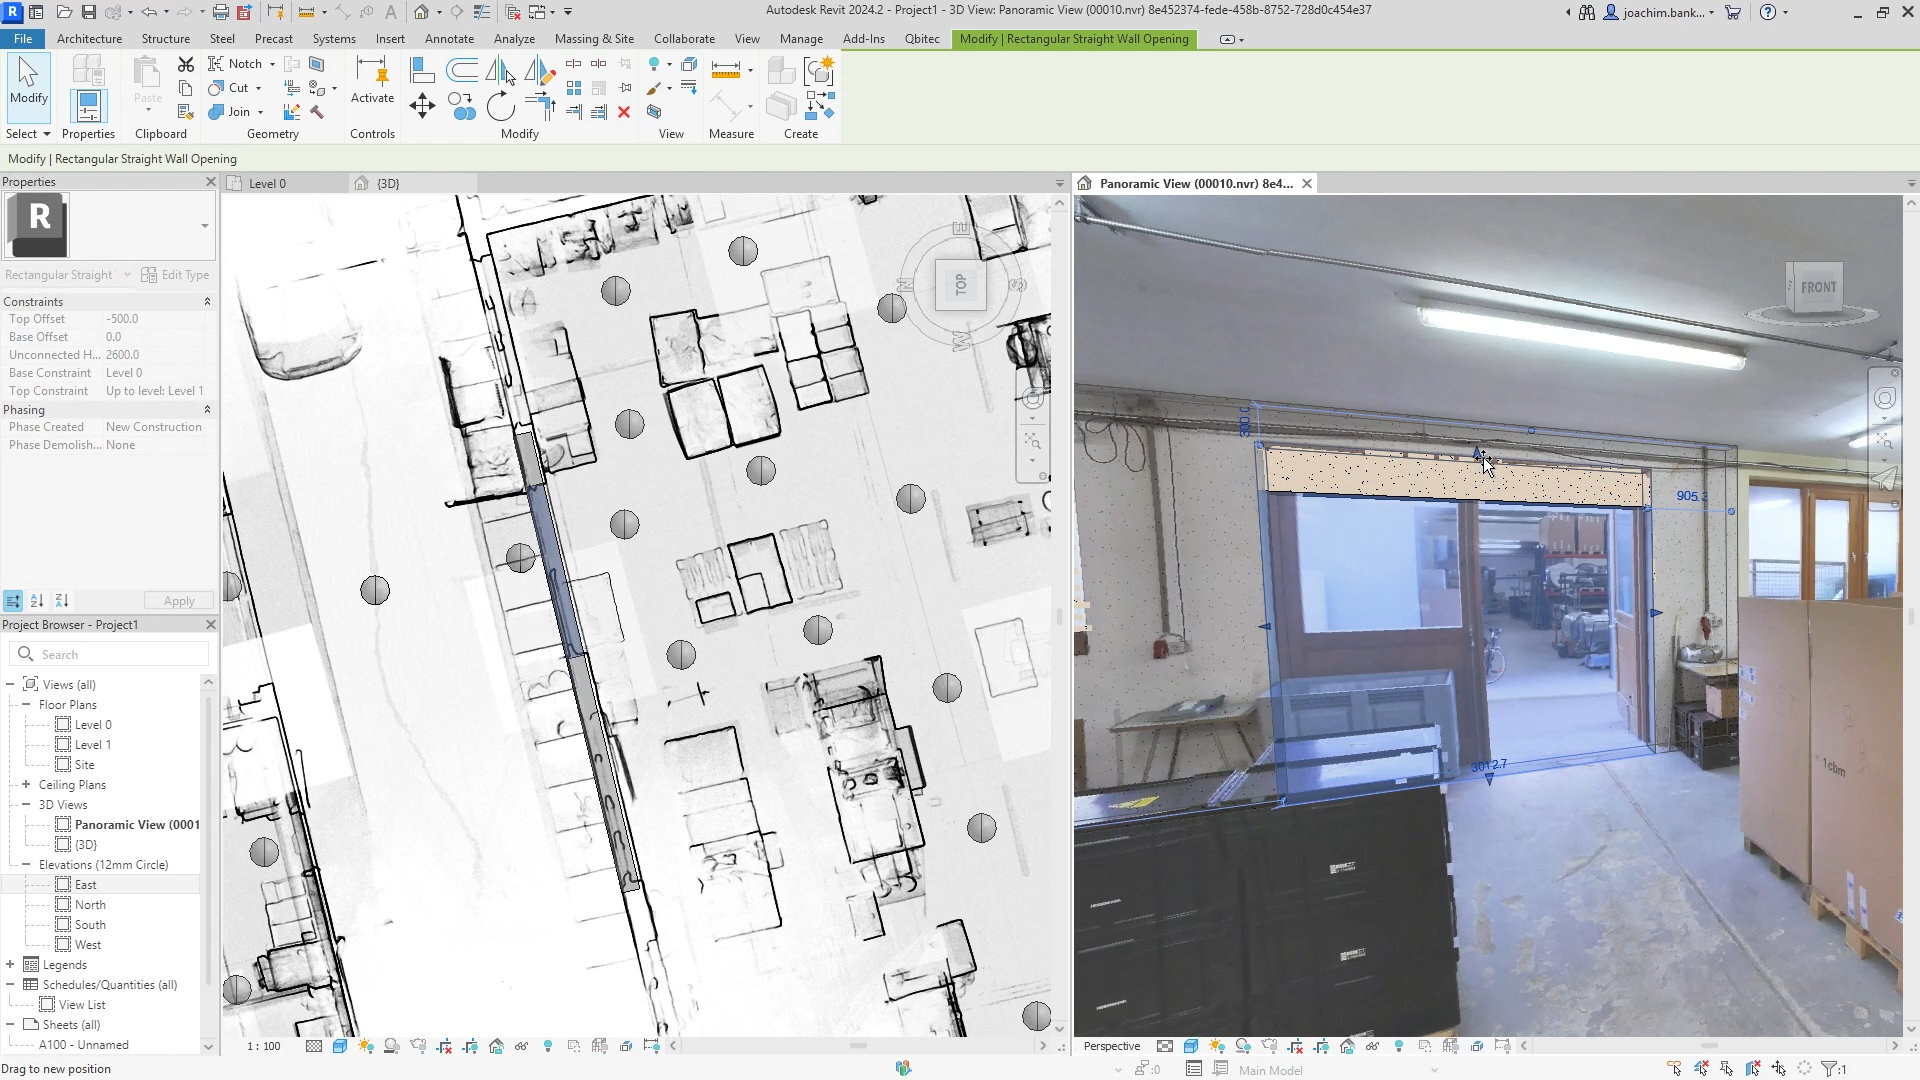
Laser scanners often capture more than point clouds. At selected scan positions, they can also record high-resolution 360° panorama images that provide a photorealistic view of the scanned environment.
These images can be especially valuable during Scan-to-BIM work: while the point cloud provides accurate geometry, panorama images make it easier to recognize materials, labels, fixtures, cables and other details that may be difficult to interpret from points alone.
Revit itself does not support panoramic images from ReCap projects. With Qbitec, scan panoramas can be displayed directly inside a Revit 3D view, correctly positioned within the point cloud and combined with the BIM model.
Because the panorama and BIM model share the same 3D environment, you can inspect photographic reality and work with Revit elements at the same time. This makes it easier to compare modeled geometry with the scan, understand unclear details and continue modeling without switching to an external panorama viewer or manually matching viewpoints between applications.
In this tutorial, you will learn:
- Under which conditions panorama images can be extracted from local point clouds,
- How to open a dataset with panorama images,
- How to use and navigate panorama views within Autodesk Revit,
- How to work with your BIM model directly inside the panorama view.
If you are using NavVis as a data source, panoramas are supported out of the box. Simply set up a NavVis source and continue with Step 2 of this tutorial.
If you have not yet set up a local point cloud source, please see the tutorial "Start locally with Qbitec for Revit"
Why Panorama Images?
Panorama images are 360° spherical images captured around a fixed scan location. Laser scanners often generate them at individual scan positions to provide color information and photographic context for the 3D scan.
Beyond colorizing the point cloud, panoramas can be a highly valuable tool for modeling:
- They provide a photorealistic representation of the scanned environment.
- They make small details such as labels, materials, fixtures or cables easier to recognize.
- They simplify navigation, since the user remains at a fixed scan position and can freely look around or zoom.
- They allow the BIM model to be compared directly with a realistic perspective, complementing standard orthogonal point cloud views.
Panoramas are typically stored either as equirectangular images, where the spherical image is projected onto a rectangle, or as cube maps consisting of six individual images.
In addition to color, panorama data may also contain depth information, but also the distance from the scan position to the object represented by each pixel. This makes it possible to correctly integrate the photographic image with 3D geometry.
Using panorama images directly in Revit allows you to work with the BIM model in a photorealistic view.
 Using panorama images directly in Revit allows modeling directly in a photorealistic view.
Supported Input Files
When you import a local point cloud into Qbitec for Revit, panorama images are automatically extracted. Extraction is supported in the following cases:
- The point cloud contains structured scans (the original scans are preserved instead of being merged into a single cloud without scanner positions).
- The point cloud file includes explicit scanner positions and color images.
Currently, Qbitec for Revit supports panorama extraction from the following formats:
| Format | Depth supported |
|---|---|
| E57 with structured scans | ✔ |
| E57 from NavVis with pano data | ✘ |
| E57 from FARO SCENE with pano data | ✘ |
| E57 from FDJ Trion with pano data | ✘ |
| RCP/RCS with structured scans | ✔ |
Step 1: Insert Dataset with Panorama Images
Panorama images are automatically extracted when you add a new point cloud cloud, if possible. For a walkthrough on how to add a point cloud, please see the tutorial "Start locally with Qbitec for Revit".

To check, whether the converted point cloud has panorama images:
- Locate the dataset in the point cloud overview
- Click the gear icon on the dataset's tile

A properties window will open.
- Select the tab "Panorama Images"
- Check, whether the list is populated with items.
You can click the eye button to get a preview of the raw panorama image.

As usual, click "Insert" to add the point cloud to your Revit project.
You will be presented the following options:
- "Center to Center": Place the point cloud center at the project center
- "Origin to Internal Origin": Place the point cloud's origin at the origin of the internal coordinate system
- "By Shared Coordinates": Place the point cloud according to geo coordinate system
- "Origin to Last Placed": This field is available if a point cloud is already in your project. It will place the new point cloud in relation to the last point cloud, making it possible to correctly assume subsequent point clouds of a site, once the first point cloud has been positioned.
Step 2: Selecting a Panorama for Viewing
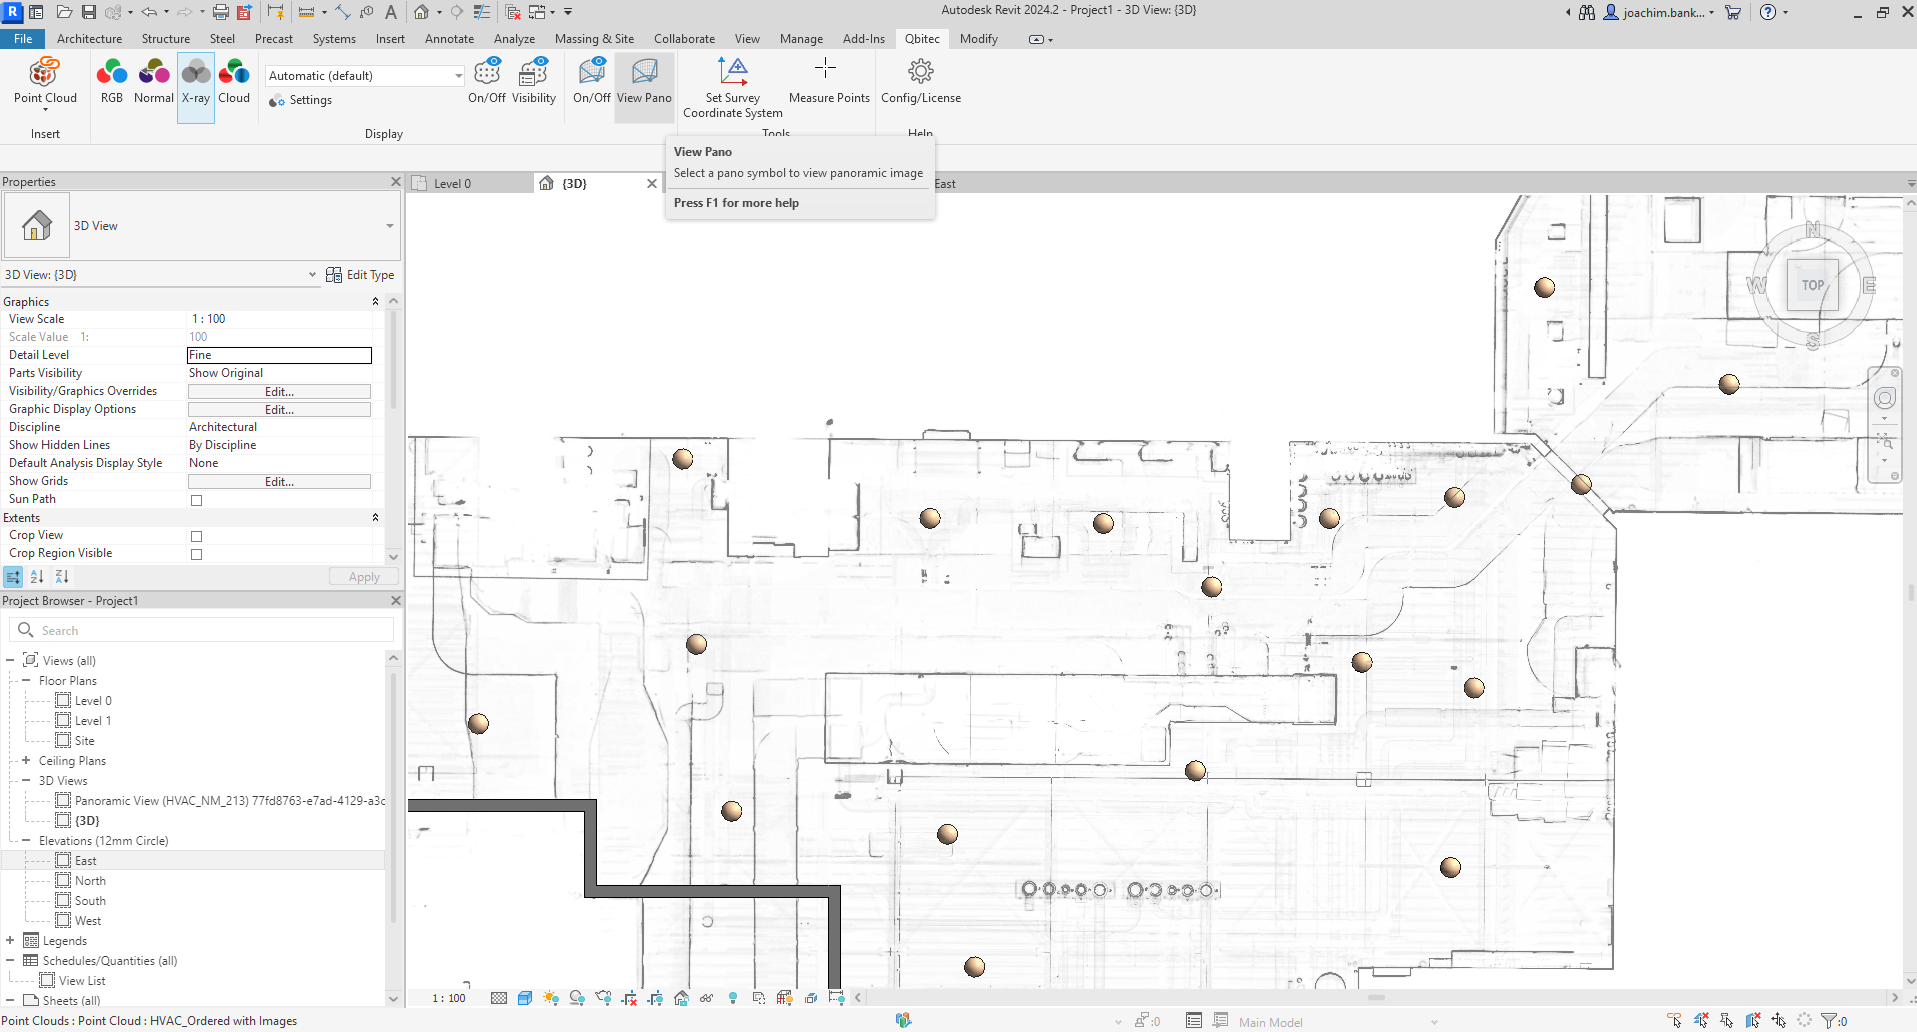
Once the point cloud is inserted, available panorama positions appear as small spheres in the views. As they are placed at the exact positions, they might be occluded by other floors or the roof. To reveal them:
- Open a 3D view
- Switch to a top view
- In the Qbitec ribbon change visualization mode to X-Ray mode.
Alternatively, you can perform any other action, that creates a section of the point cloud, for example by:
- Setting up levels and switching to a level view, or
- Using the section box in the 3D view
With the revealed scanner positions:
- In the Qbitec ribbon click the "View Pano" button
- Click one of the pano spheres
A new 3D view opens with the panorama image active.
Step 3: Navigating inside a Panorama View
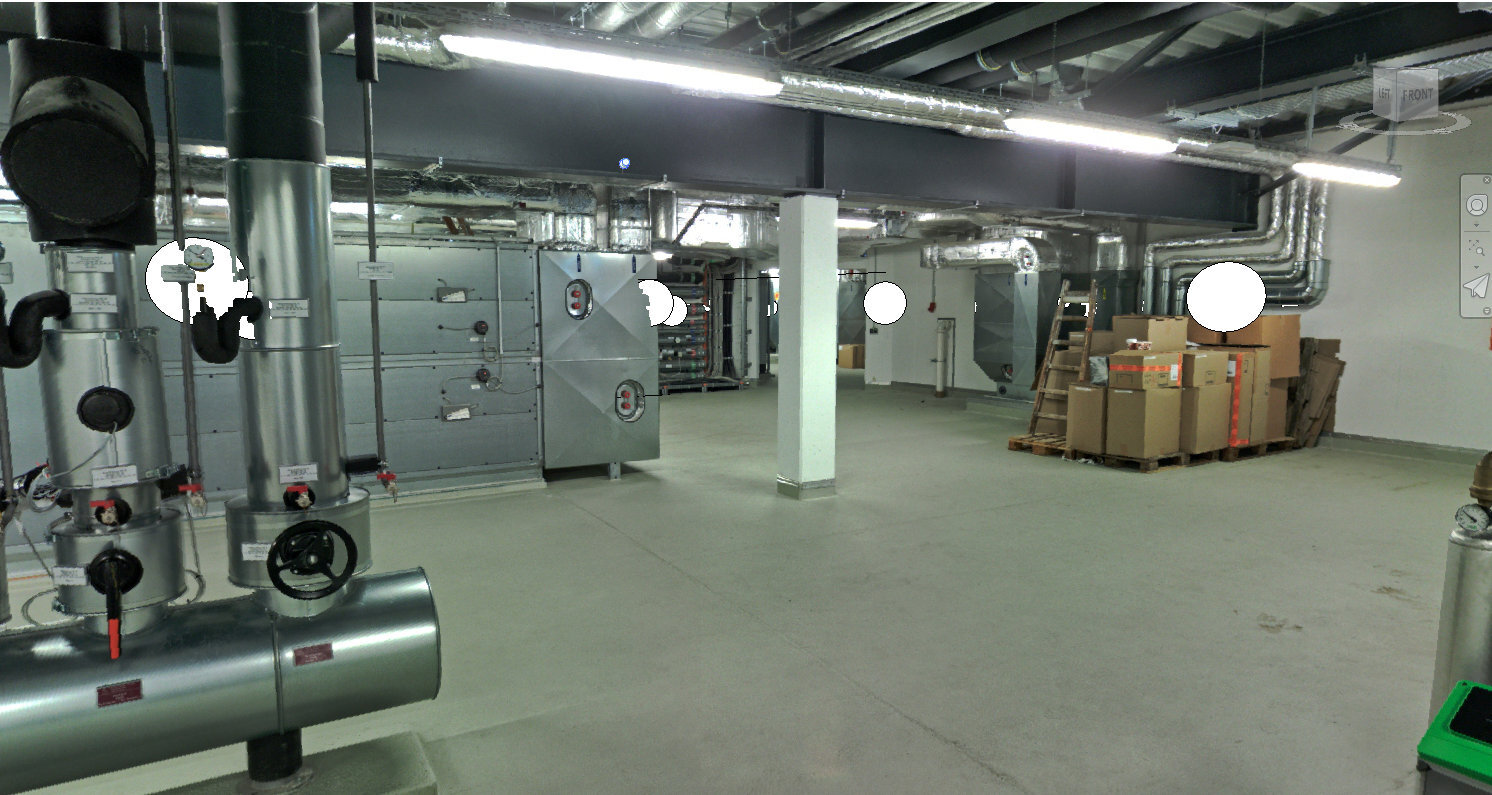
Use the mouse to navigate.
- Press the right or middle mouse button and move the mouse horizontally to rotate left and right, or vertically to rotate up or down.
- Use the mouse wheel to zoom in and out.
Please note: Revit itself has no concept of a fixed location. Despite our efforts, it is possible to “break out” of the panorama view (e.g., by using the view cube), which can result in distorted rendering. If this happens, simply adjust the position with the mouse wheel.
To walk between panorama images within the same 3D view:
- In the Qbitec ribbon click the "View Pano" button
- In the panorama view, select another sphere symbol
This moves your viewpoint to the selected panorama view, without opening a new window.
Step 4: Hiding Panorama Symbols

Panorama spheres are represented as Revit objects. This means they will appear in exports and prints unless hidden. To toggle visibility, click the "On/Off" button next to the "View Pano" button.
And Done!
You can now navigate between real scan positions and work with your Revit model directly inside the panorama view.
Instead of switching between Revit and a separate panorama viewer, Qbitec brings point cloud geometry, photographic reality and BIM geometry together in the same working environment.