
Inserting Point Clouds
To insert a point cloud into your Revit document click on the Insert Point Cloud button inside the Qbitec Ribbon to open the Insert Point Cloud dialog.
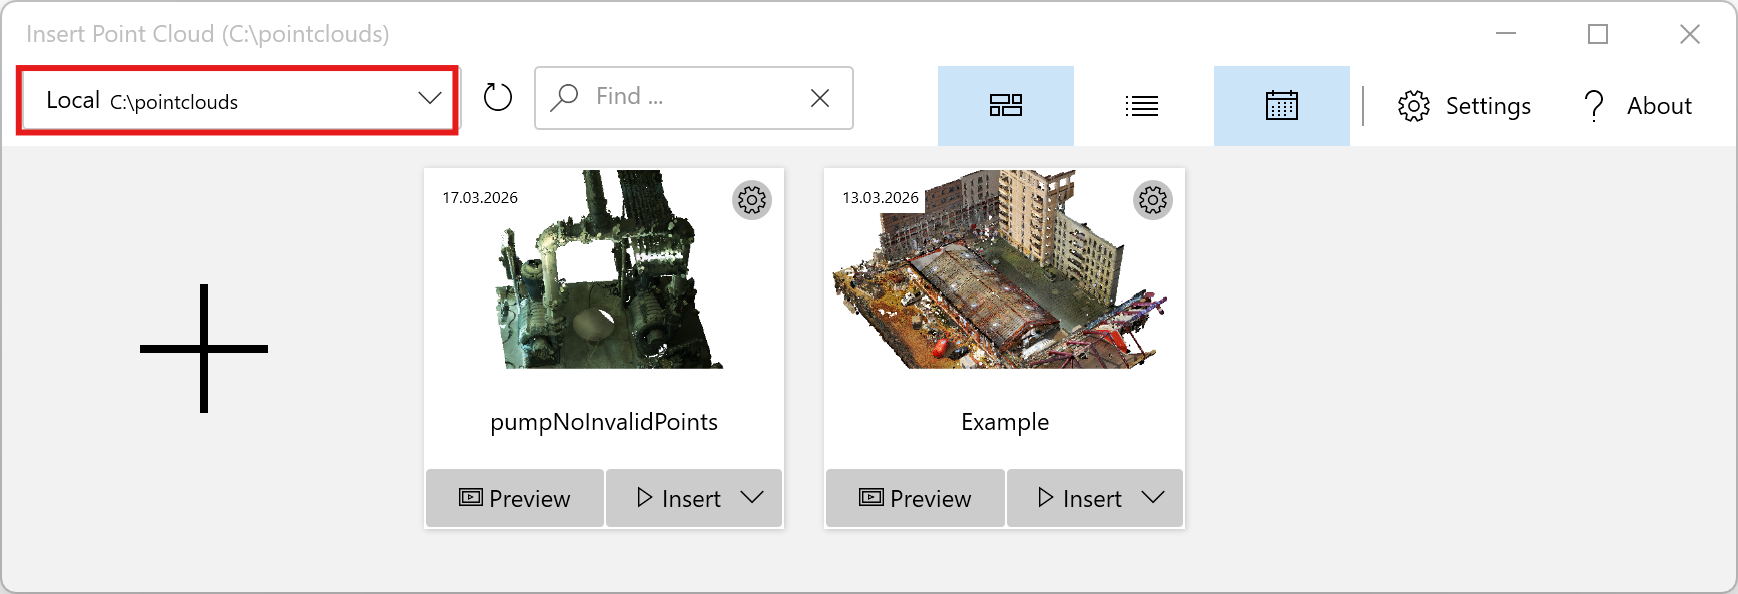
While the main purpose of this dialog is to insert the relevant point clouds into your Revit document, it also enables you to browse, sort, filter, preview, and inspect the metadata of all datasets from specific data sources.
Workflow Overview
- First, select the data source that contains the point cloud you want to insert.
- Search the list of point clouds for the specific dataset.
- Click on the Insert button and choose the appropriated Insertion mode.
Select a Data Source
Data sources are selected using the Data Source Selector combo box at the top left. Once a data source has been selected, the list of point clouds is updated. If any external changes have occurred in the data source—for example, if a point cloud was deleted or copied using Windows File Explorer—click the Refresh icon next to the Data Source Selector to reload the point cloud list.
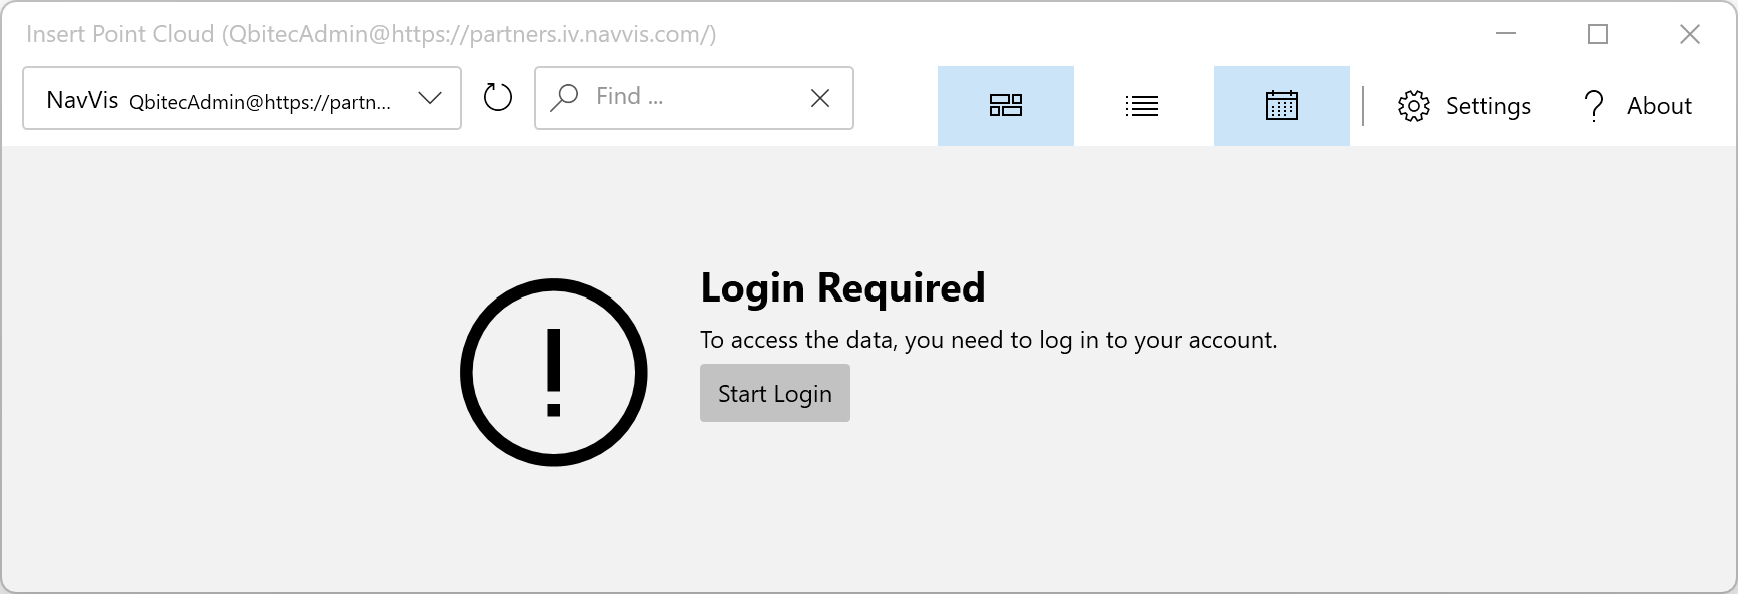
When a remote source is selected, the dialog may prompt you to log in before displaying the contents of the data source.
Filtering the Point Cloud List
To filter the list of point clouds, enter a substring in the Find text field.
You can see a live preview of the search results as you type. Point clouds are also sorted by search match quality.
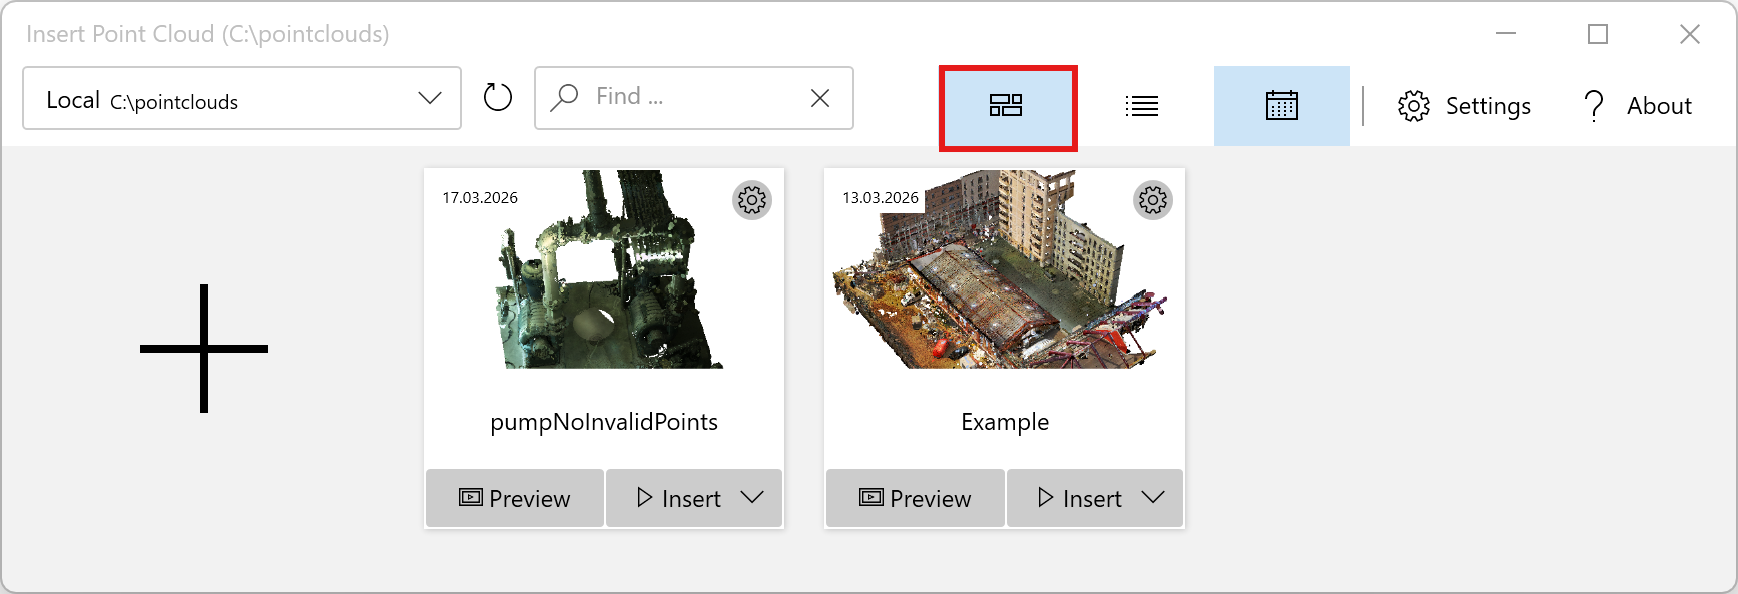
Tile and List View
To browse the list of point clouds you can choose between the tile view and the list view by clicking onto the corresponding icon buttons.
Here the list of point clouds is displayed using the Tile View:
and here you can see the same content displayed using the List View:
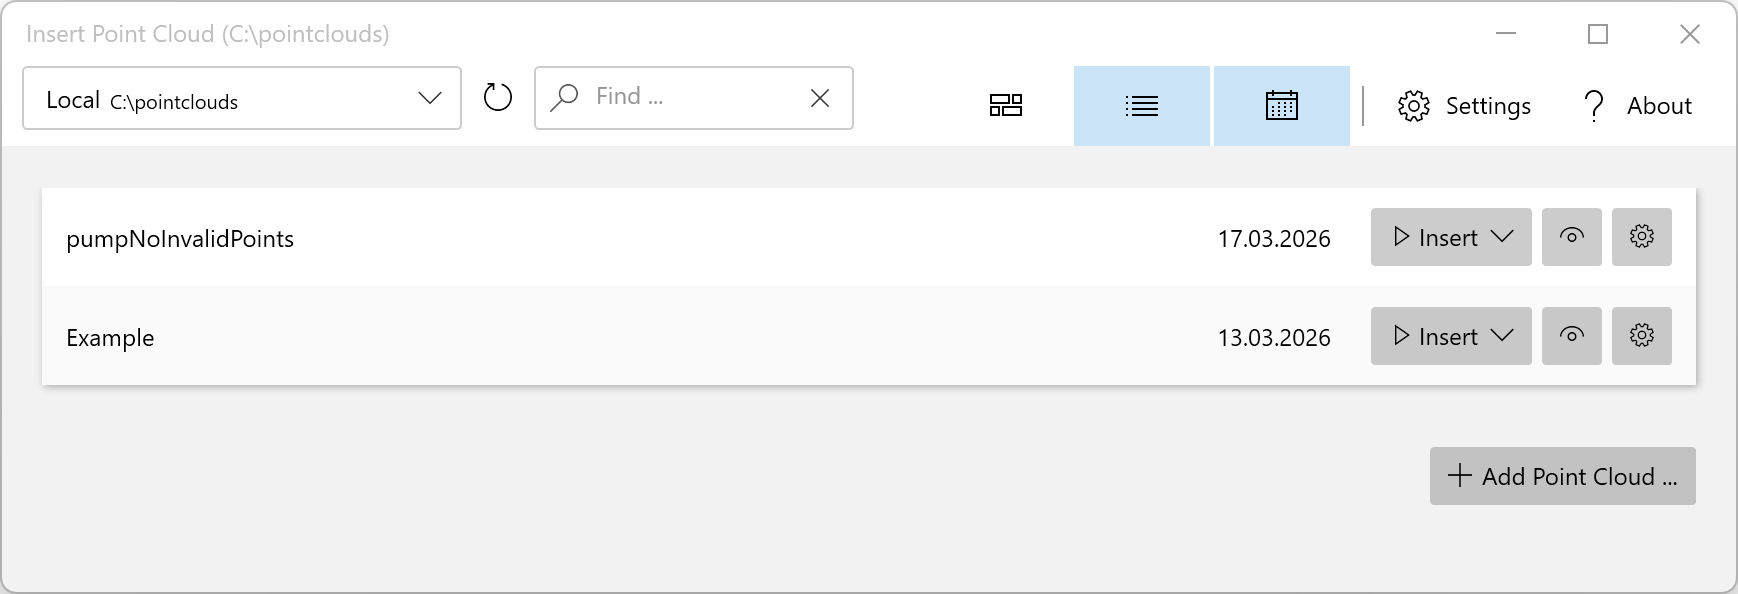
Tile view provides a thumb nail preview, making it easy to recognize point clouds, but it shows fewer items at once and metadata is less visible. List view displays more items compactly, allowing easy sorting, filtering, and comparison of metadata, though it is less visually appealing and previews are not prominent.
Sorting Point Clouds
Point clouds are typically sorted alphabetically, but you can also sort them by date by clicking the calendar icon.
![]()
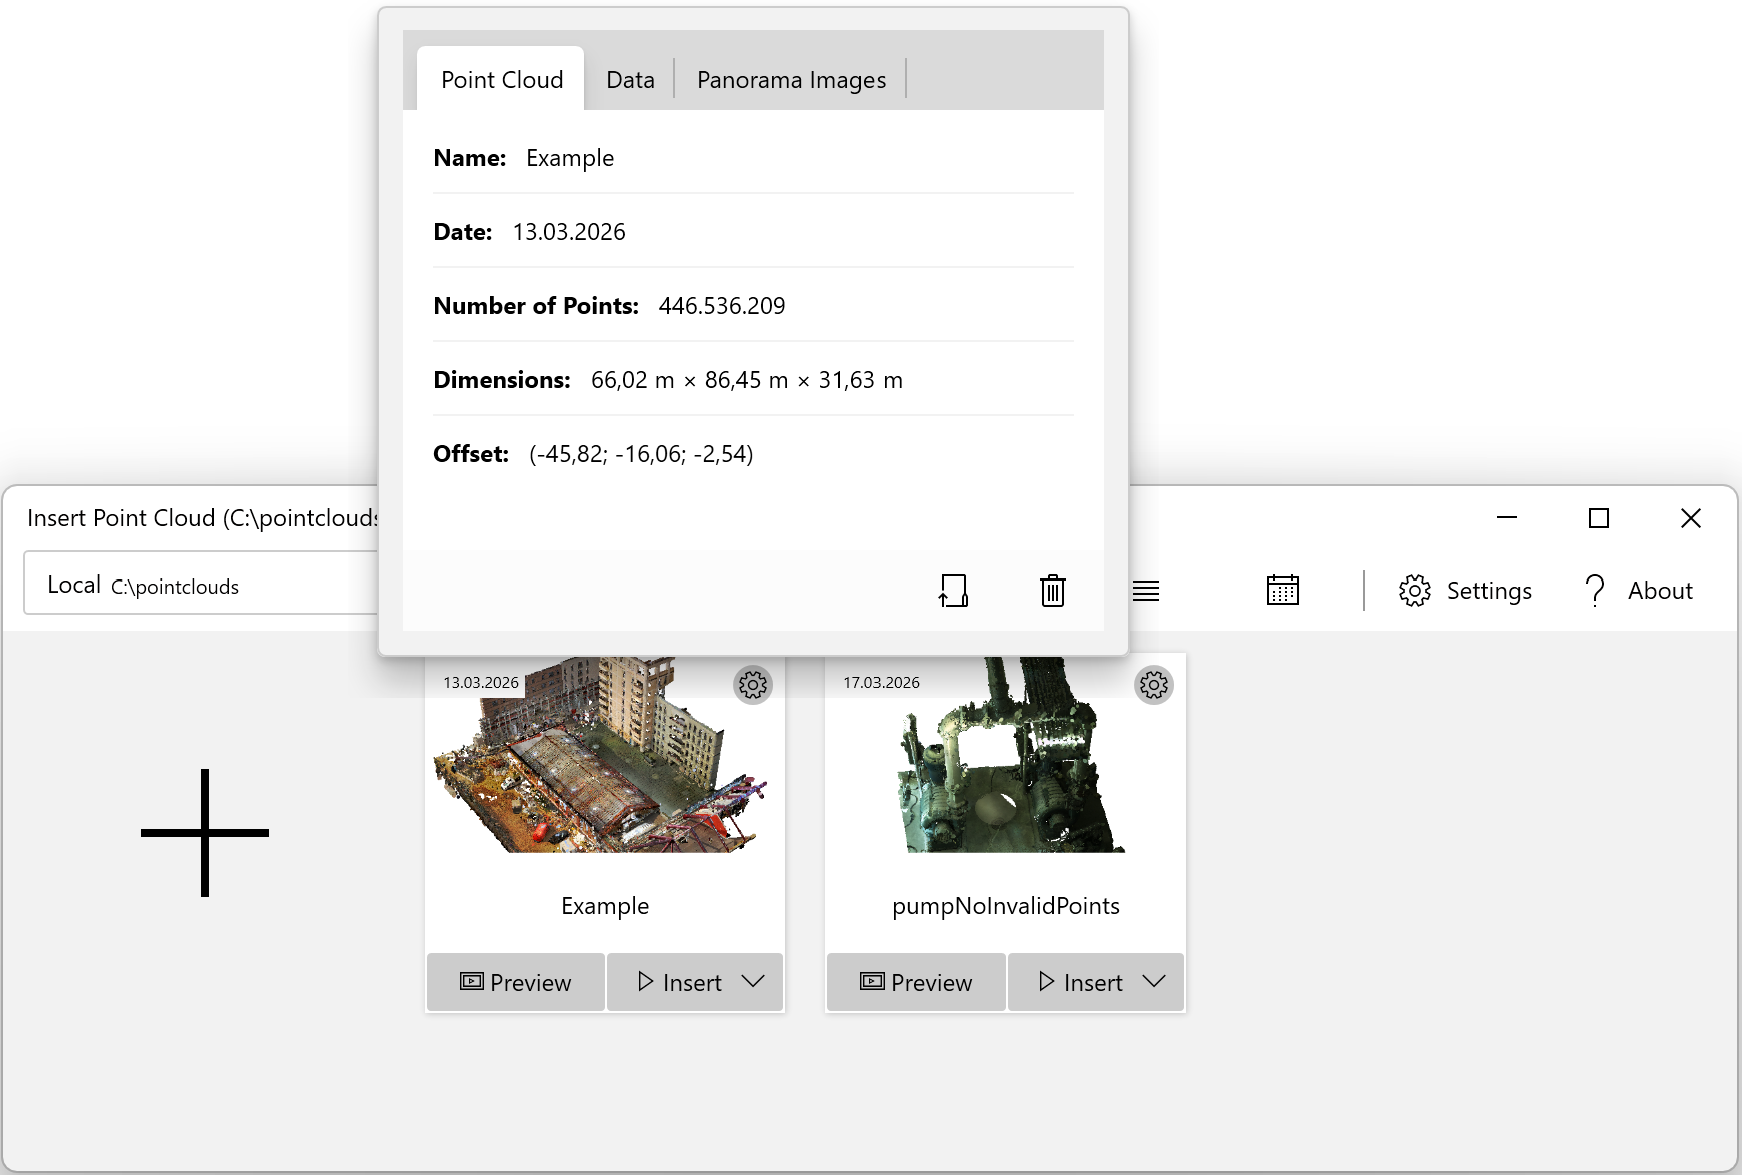
Inspecting Point Cloud Meta Data
You can inspect the metadata either by hovering over a dataset with the mouse cursor or by clicking the gear icon of a point cloud to view more detailed information.
Interactive 3D Preview
Sometimes the auto-generated point cloud thumbnail is not sufficient to identify the required dataset. In that case, you can also inspect the point cloud before inserting using a small interactive 3D view by clicking the Preview button. Inside the preview window, you can zoom, rotate, and pan the camera using the mouse to focus on your personal point of interest.
Insertion Modes
The insertion mode determines where the point cloud will be placed relative to the respective coordinate systems.
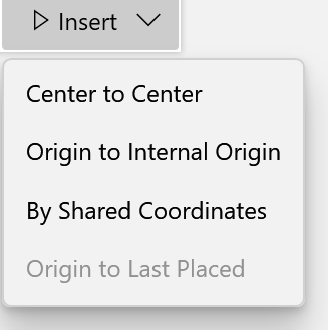
- Center to Center - Aligns the point cloud center with the center of the project center
- Origin to Internal Origin - Places the point cloud origin at the internal project coordinate system origin
- By Shared Coordinates - Geo referenced point clouds are placed correctly if the survey coordinate system has been set correctly beforehand, e.g. using Set Survey Coordinate System
- Origin to Last Placed - Positions relative to the previously placed point cloud (available after the first point cloud was inserted)
Hint: If you can't see the point cloud after insertion switch to a site plan, side view or to a 3d view. The point cloud may be clipped in some specific view e.g. because level height may not be setup correctly at the beginning.