
Data Sources
Before inserting your first point cloud into an Autodesk Revit document using the Qbitec for Revit Plugin, you must first configure a data source. A data source is the location where your point cloud data is stored.
A data source can be either a local folder or a network drive / folder or a remote source in the cloud such as NavVis IVION.
Adding a new Data Source
If no data source has been configured yet and you click the Insert Point Cloud button in the Qbitec Ribbon, the Insert Point Cloud window will notify you that a new source must be created before a point cloud can be inserted.
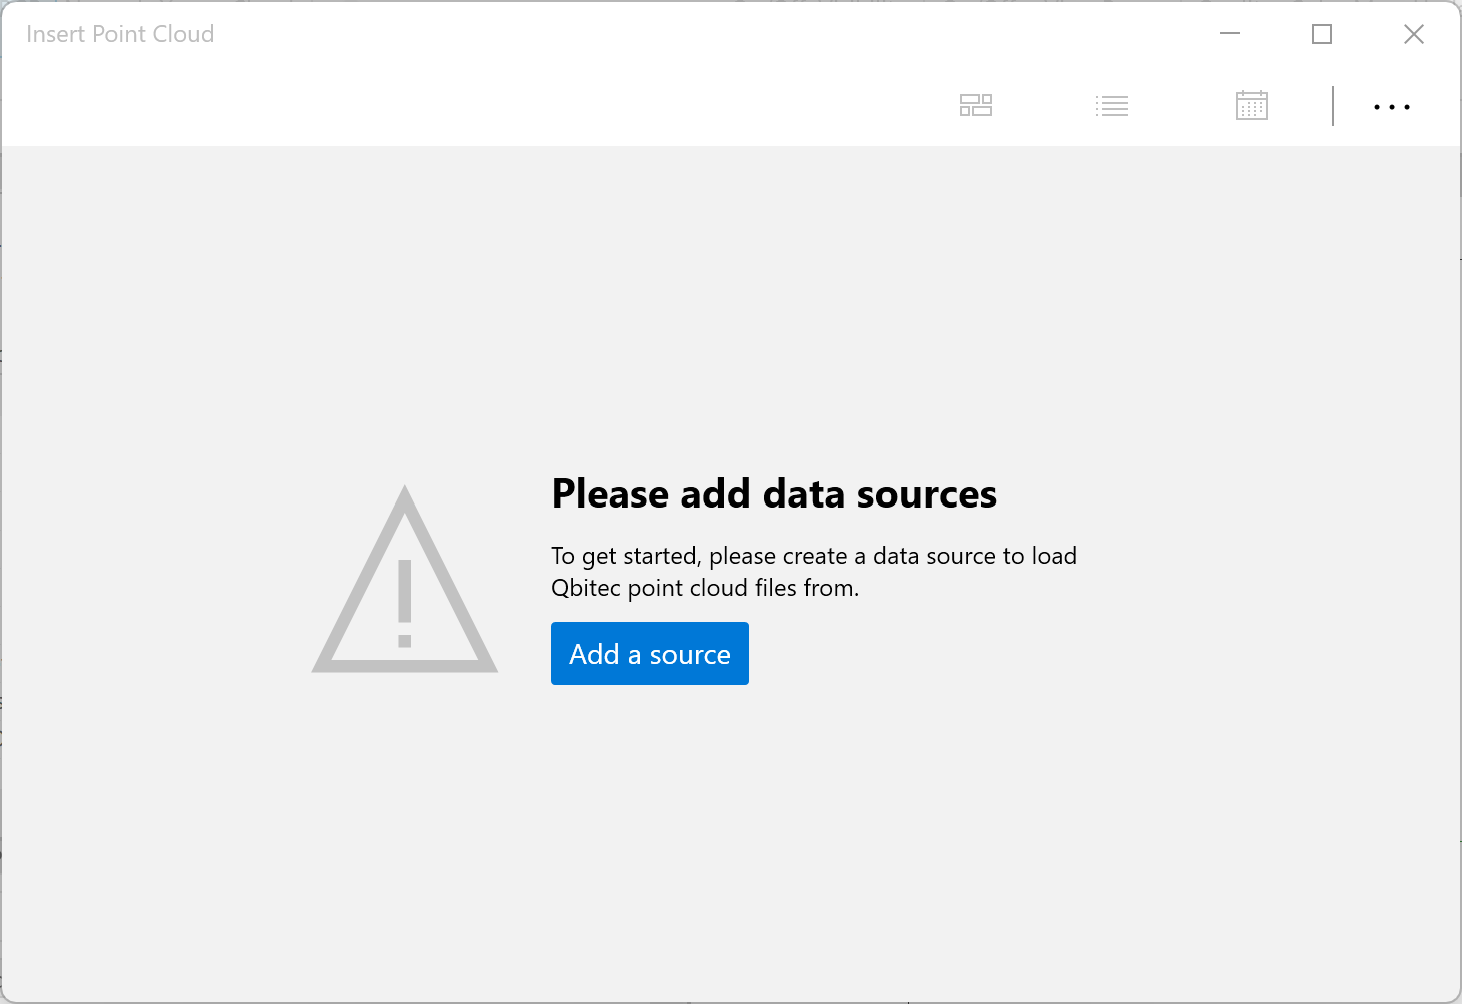
Click on the Add a source button to configure your first data source.
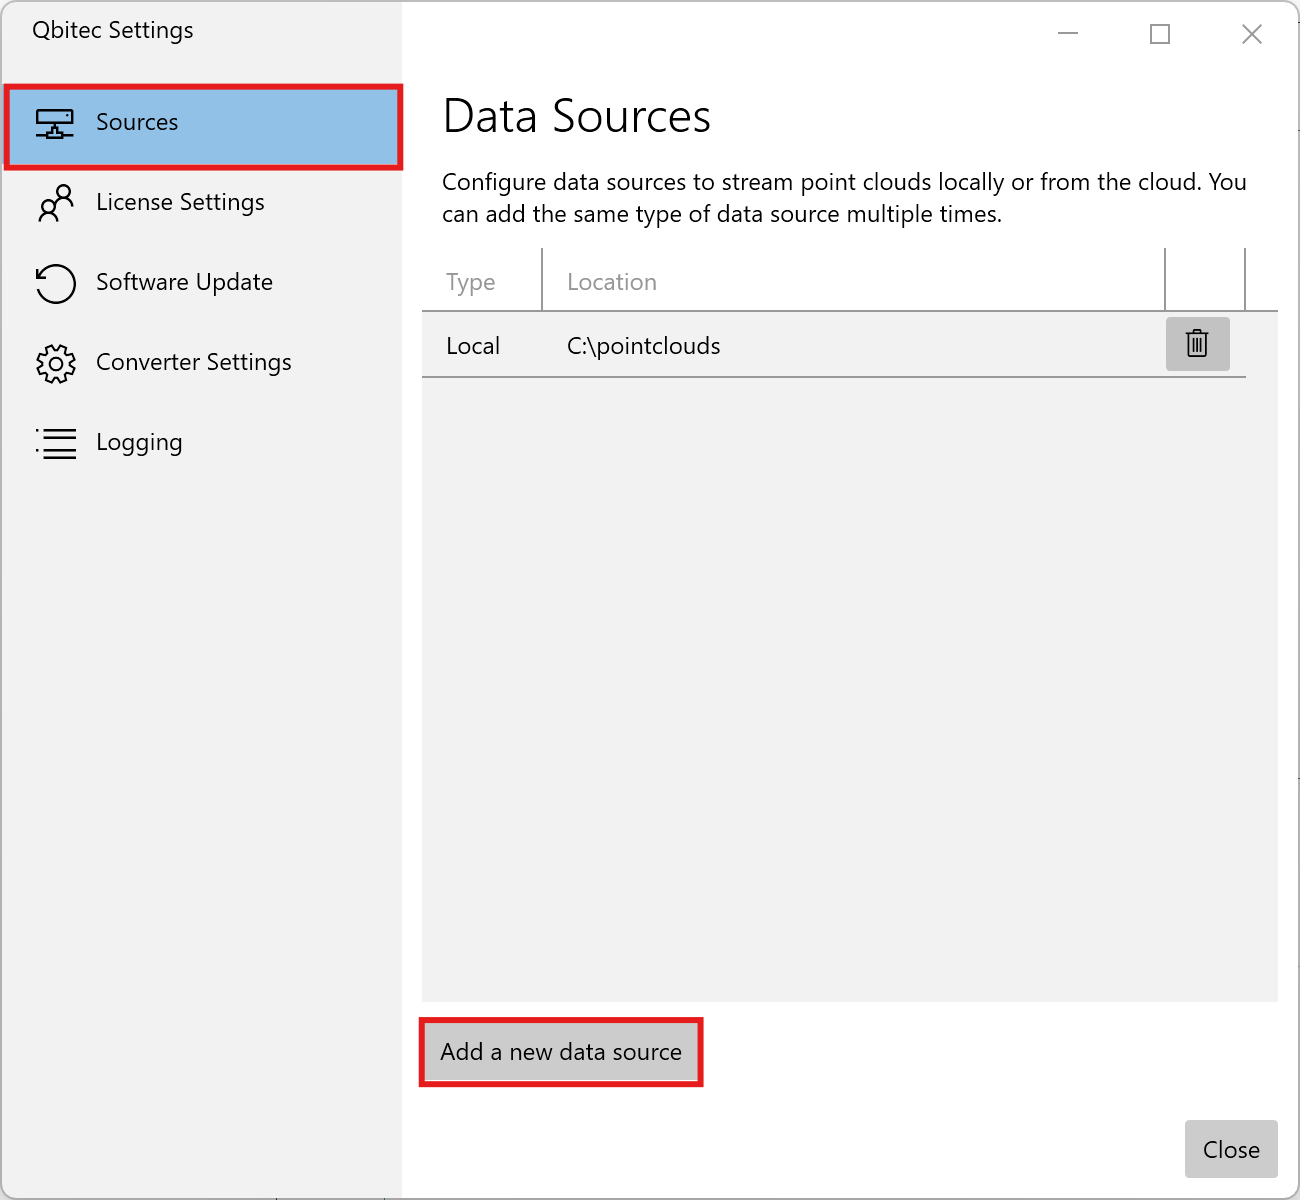
If data sources already exist and an additional one needs to be added, open the Qbitec Settings dialog via the Config/License button in the Qbitec Revit Plugin ribbon in Autodesk Revit.
Then select Sources on the left side and click Add a new data source to start the wizard for creating a new data source.
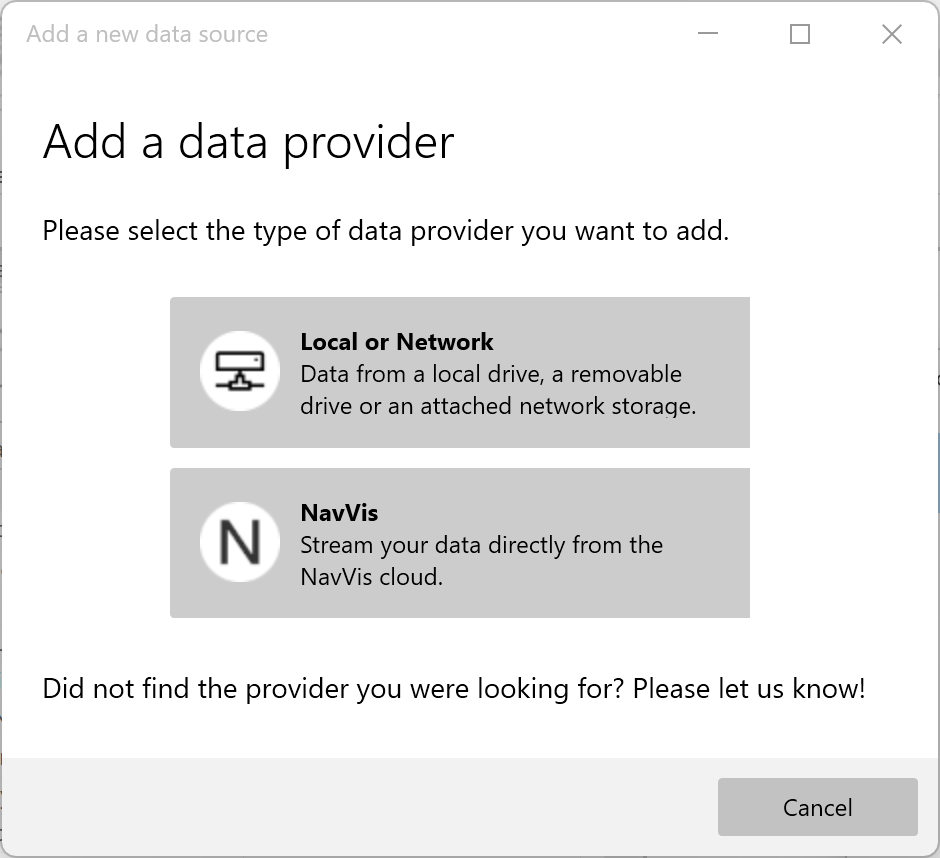
First you need to select the type of data provider which can be either Local or Network or a NavVis IVION instance.
Local or Network Sources
If you plan to store your point clouds in a folder on a local hard drive, an external USB drive, or a network drive path, you need to configure a local data source.
You can either select a folder that already contains Qbitec point clouds, or choose a new folder where Qbitec point clouds will be stored in the future.
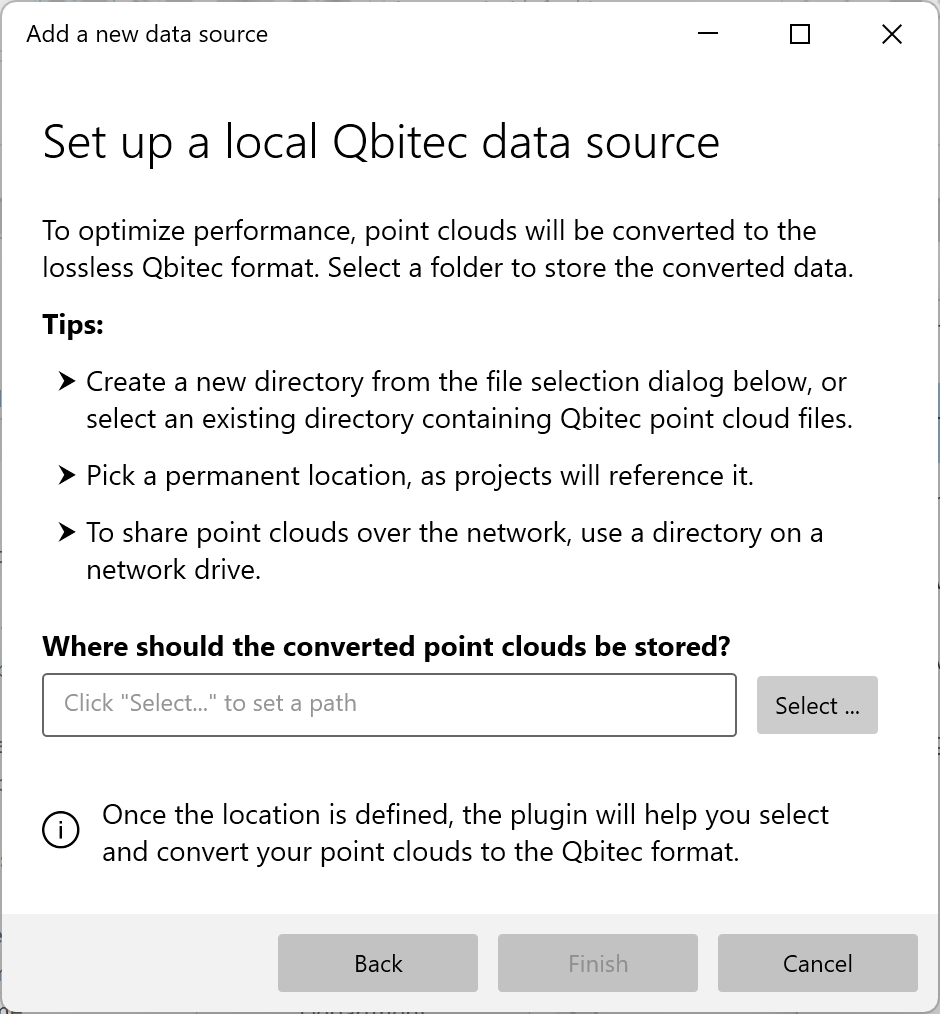
Point clouds that are not available in the Qbitec format—such as files in E57, Autodesk ReCap, or LAS/LAZ format—must first be converted.
The selected target path refers to the folder where the converted point clouds will be stored, not the location of the original source data.
Once a valid folder is selected click on the Finish button to complete the wizard.
To convert your first point cloud see Point Cloud Conversion section for more details.
NavVis IVION Sources
If you chose to set up a new NavVis Ivion instance as a data source you first need to provide the URL of the instance.
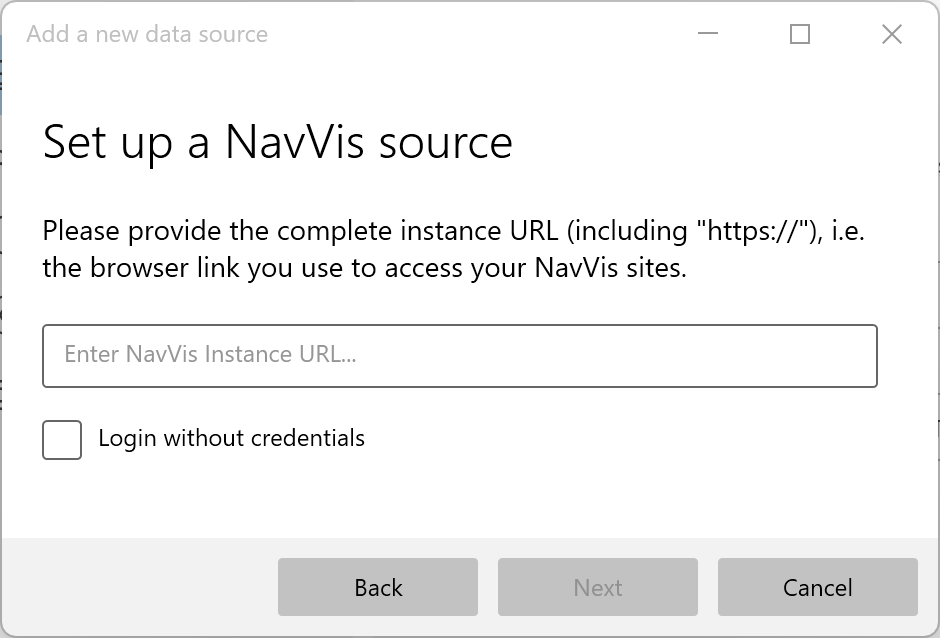
If access to the instance should be possible without credentials, the Login without credentials option must be enabled. If access is intended to require a specific login, this option must remain disabled.
Control over which data within the instance is accessible is managed entirely on the server side. Furthermore, the plugin operates in a strictly read-only manner. It does not perform any API calls to the NavVis instance that could modify or delete data.
When clicking Next, the connection to the instance is tested. If required, your default web browser will open to handle the login process. Enter your credentials and click Allow access.
Since the authentication process is handled entirely through the browser, the Qbitec plugin never has access to the actual password. As a result, the same rules apply as when accessing the NavVis web interface in a browser—for example, regarding password storage via password managers or the use of SSO mechanisms.
Complete the creation of the NavVis source by clicking the Finish button.
Manage Existing Data Sources
To manage existing data sources open the Qbitec Settings dialog and select Sources on the left.
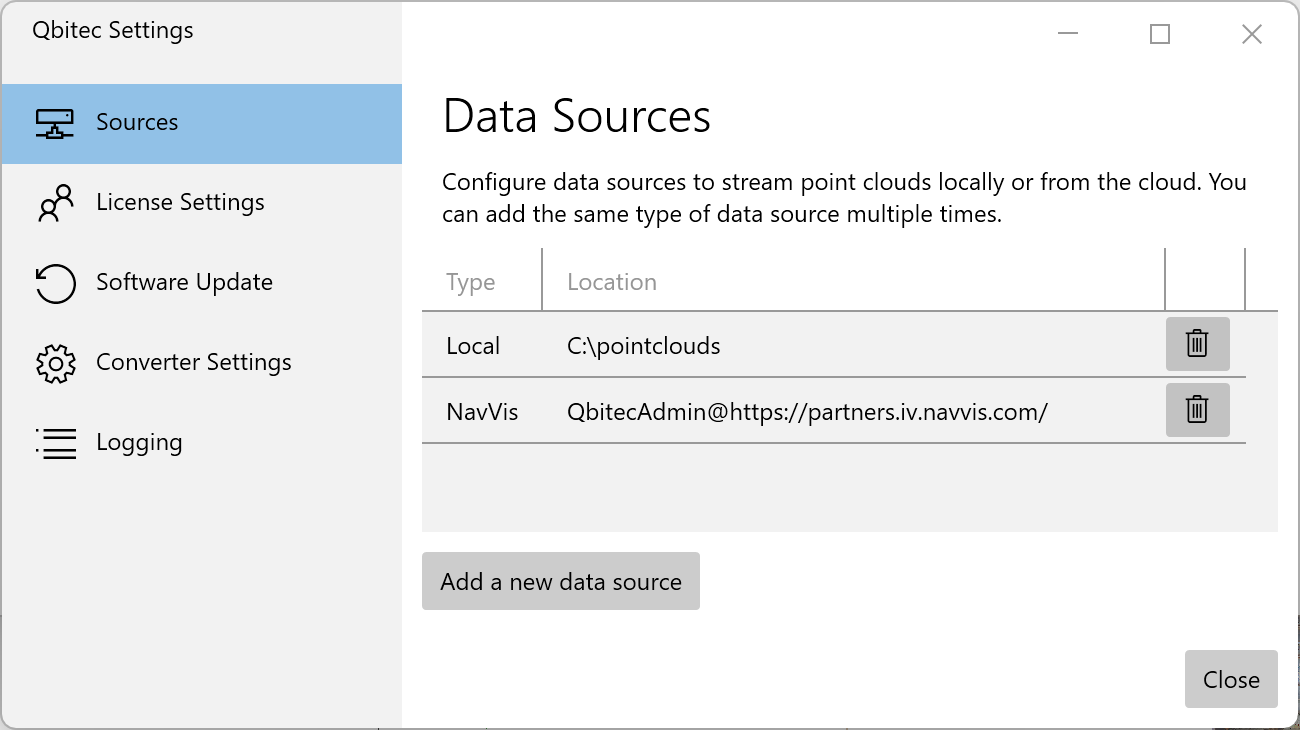
Under Data Sources, a list of all configured data sources is displayed, including their associated type and location.
A data source can be removed using the button with the trash can icon. This action only removes the reference to the respective data source; the underlying data itself is not deleted!